Two short weeks to go until the One Room Challenge deadline arrives! The good news is that we have really made some progress since last week. The bad news is that there’s still so much to do.
We have the framework in place for what was the problem area above the fridge. I am happy to say that I love how it’s working out. It still needs some adjustments, but this was a huge step towards getting there.
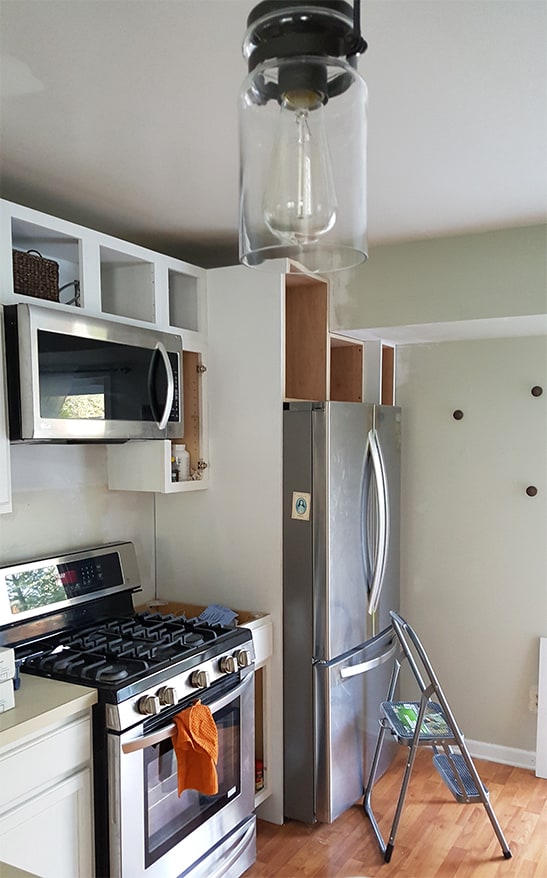
I was going for a custom built-in look around the fridge, with wine racks above it. They’re not complete yet, but I still feel like my vision really materialized now that the framework is in. A big thanks to my contractor (my husband’s cousin) for accomplishing this for us. Especially since I changed the plan up several times on him.
In addition to that, I’ve gotten most of the cabinets painted with the exception of 2 of the upper doors. One is still being built, and one is still having the glass installed. I also need to paint the inside of the built-ins over the fridge. We did manage to install the cabinetry hardware last weekend.
Thank you to Amerock and Wayfair for supplying the hardware for this project*. I had a hard time narrowing down which hardware to go with, because Amerock has so many to choose from.
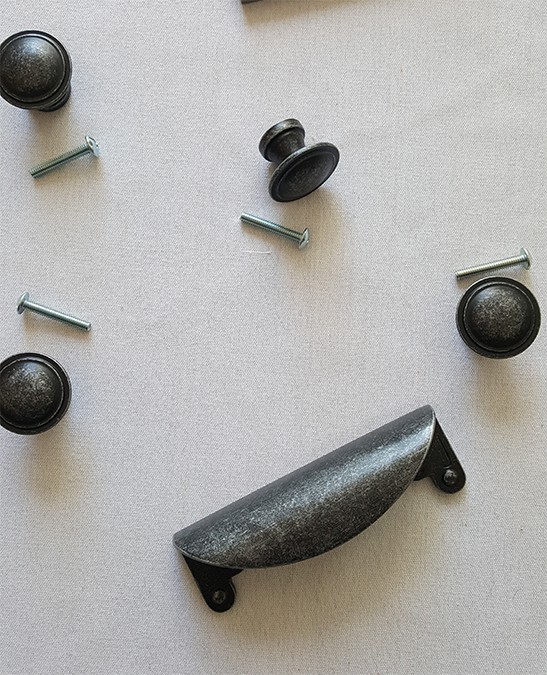
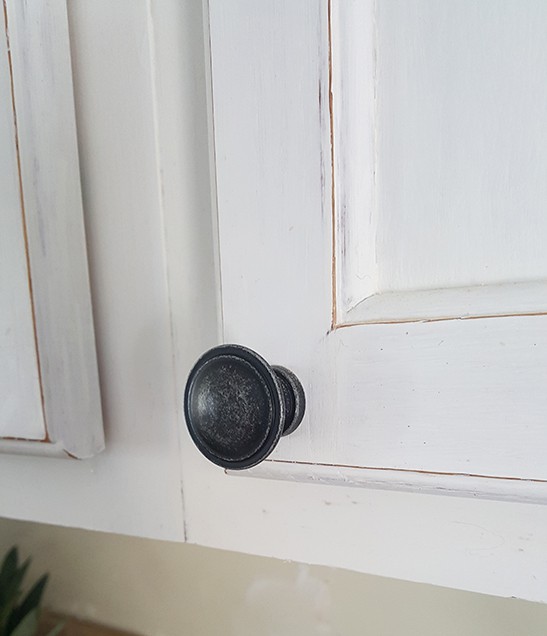
I ending up selecting the Allison Mushroom knobs in wrought iron dark along with the Inspirations 3″ Center Cup Bin pull. My husband found a quick and easy way to install them using his laser level**.
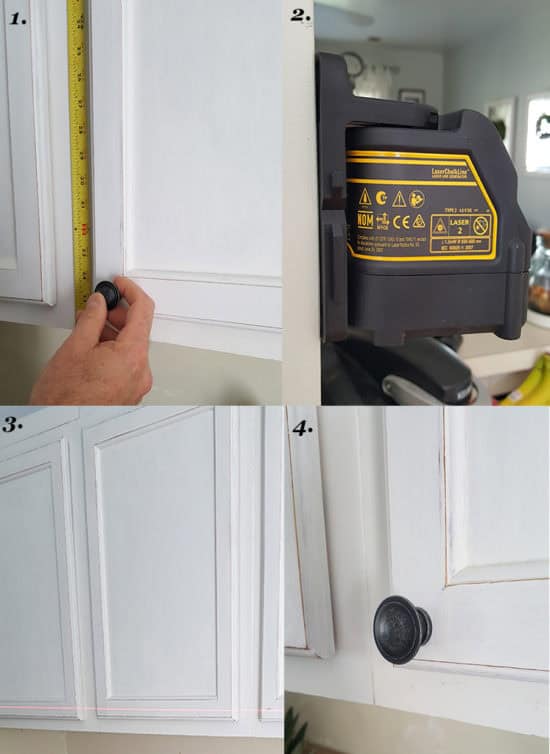
The Easy Way to Install Cabinetry Hardware:
- Measure from the ceiling down to where you want the knobs placed.
- Next attach a laser level at that height on the opposing wall.
- The laser level projects a level light across the front of the cabinets. This way you only have to measure one time, rather than for each door. Mark each door with a pencil where you will drill.
- Drill the holes and attach your hardware.
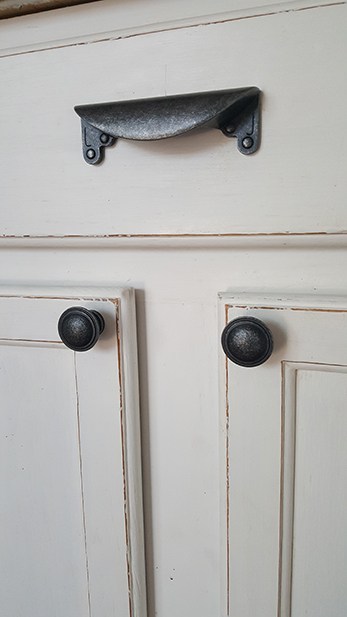
I am loving the new hardware, especially those bin pulls. I like that they are a twist on the bin pulls that are so popular right now. As you can see from the photo above, I chose to give my painted cabinets a slight distressing around the edges. It shows up more intense in the photos than it actually looks in person.
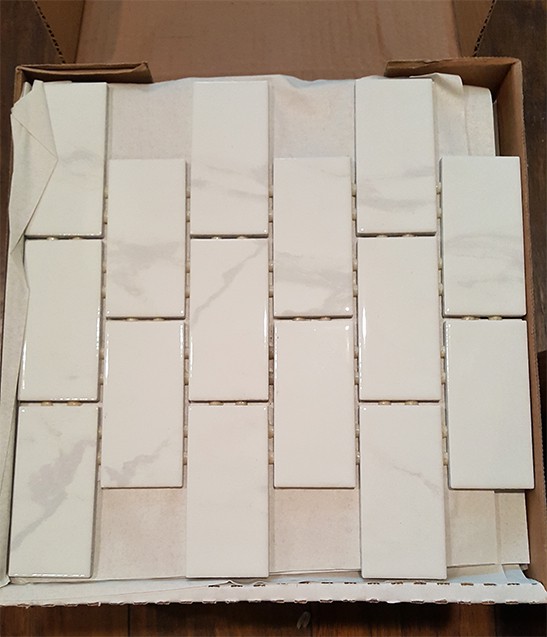
As far as other kitchen progress, we purchased our Carrera marble subway tile last weekend at Lowes. We needed 3 boxes and that’s exactly how many were in stock that day, luckily!
The countertops and the undermount sink are being installed today, finally! In reviewing my checklist for this week, I realized that I left several thing off of it in the beginning, so this is the updated version.
Buy a new refrigeratorAdd a row of cabinetry above the existing cabinets to extend to the ceiling- New countertops
- New undermount sink
- New backsplash
Paint existing cabinets- Add glass fronts to some of the cabinet doors
- Install lighting in new upper cabinets
- Install lighting under lower cabinets
Add new cabinetry hardwareInstall new pendants over the sink- Completely makeover the existing table and chairs
- Paint the walls
- custom built-ins over the refrigerator
- custom slide out pantry
- crown molding
- add bun feet under cabinets
I still need to pick which crown molding we will use to top the cabinets. We’ve decided to just continue that molding throughout the kitchen (yay!). I don’t know if that will really be done by the ORC deadline, but I’m hoping to get it up above the cabinet wall at least.
Our biggest project this weekend will be tiling the backsplash. I have some more painting to do, including 2 more kitchen chairs and a few cabinets to touch up. It will be a busy one over here for sure!
In case you missed the previous One Room Challenge posts, you can catch up here:
Week 1- Kitchen Makeover Before
Week 2- Kitchen Design Plans
Week 3- Kitchen Pendant Lighting
Week 4- Installing Cabinetry Hardware
*this post was sponsored by Amerock and Wayfair.
**affiliate link-read my full disclosure policy here.
(adsbygoogle = window.adsbygoogle || []).push({});