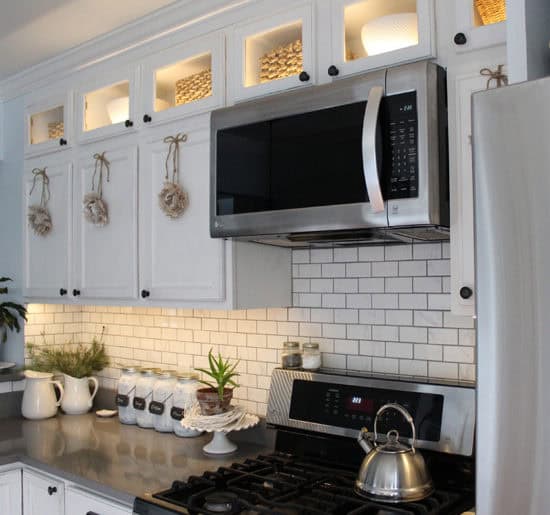
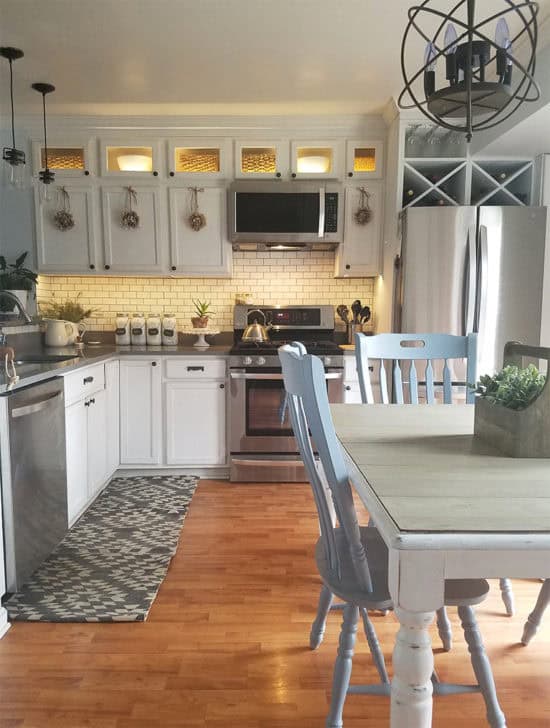
Last year when we did our kitchen makeover, one item on the to-do list was installing cabinet lighting in both the new upper cabinets and under the existing lowers. We finally just got around to finishing up that project recently (things take time around here!) and what a difference it makes! It’s really pretty easy to do too!
I worked with Lamps Plus* on the lighting for my kitchen. In addition to these amazing pendant lights, we also ordered these LED tape lights for the cabinet lighting.

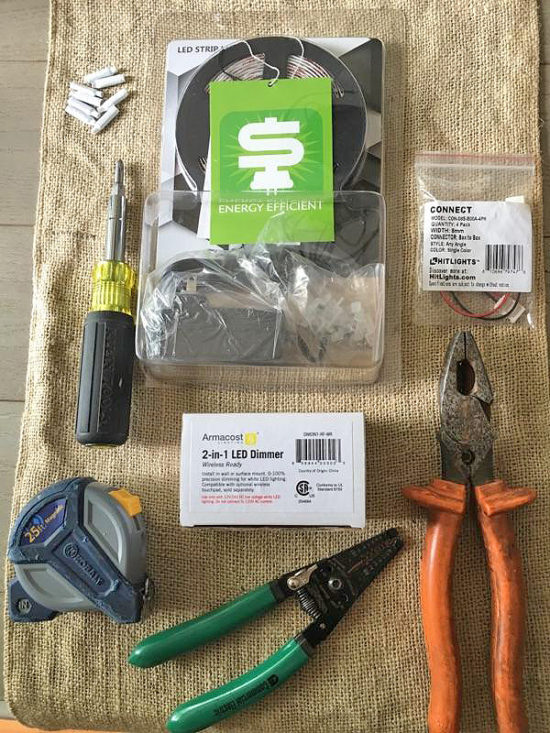
What You Will Need:
B Wire connectors (referred to as “chicklet connectors”
Drill
Right Angle Drill Bit Attachment
One thing to keep in mind with this project is you will need an outlet in the area. When we added our upper cabinets, my husband installed an outlet for the microwave. Also note, my husband is very experienced with electrical work, and though this is relatively easy and low voltage if you’re not at all experienced with electrical, you may want to hire someone for this. (Read my full disclosure here)
Step 1- Plan the path for your lights.
We first measured the length of lighting we needed for under the lower cabinets. We cut one strip for the cabinets to the left of the microwave and one for the cabinet on the right. Be sure to follow the directions on the lighting on where to cut. We also cut sections for each the upper cabinets.

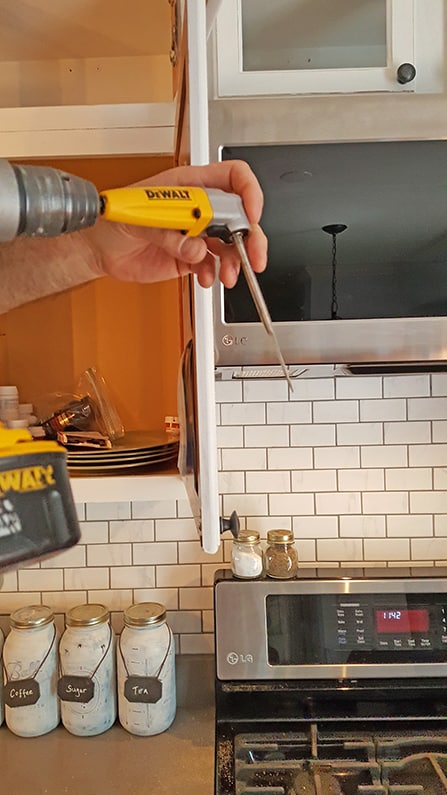
Step 2 – Drill holes where you need to run the lighting.
We started with the uppers, because that’s where our hidden outlet is. We drilled a small hole in between each cabinet section. We wanted to connect our upper and lower lighting so that they would all be on the same circuit. In order to connect the upper lights to the lowers we also drilled holes in the cabinets on either side of the microwave in order to run this wire from top to bottom.
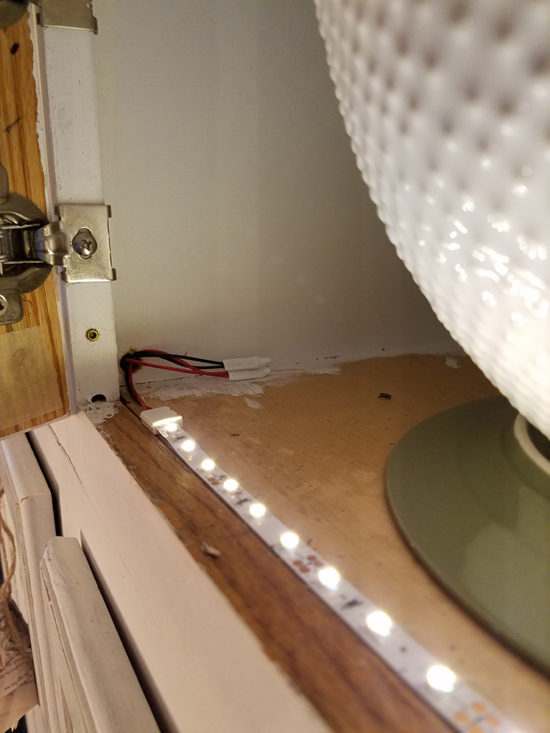
Step 3- Add connectors.
The next step is to connect all of the lighting together. Add the wired connectors to the tape lighting by just sliding them into where the metal contacts meet the tape lights.

Step 4 – Splice the wires.
Assemble the lighting in the cabinets and then splice the 18/2 gauge wire and attach each section as shown below. Use the wire strippers to strip about 1/4″ of the wire to expose the copper leads.

My husband also used a T25 staple gun to secure the wiring into the corners to keep them neatly in place. These lights have a sticky backing, you just peel off the paper and stick them into place. If your cabinets are older or dusty you may want to just wipe them down with some rubbing alcohol first so it adheres better. Here is how they look in the uppers. (Clearly, I never finished painting the inside of my cabinets during the one room challenge).
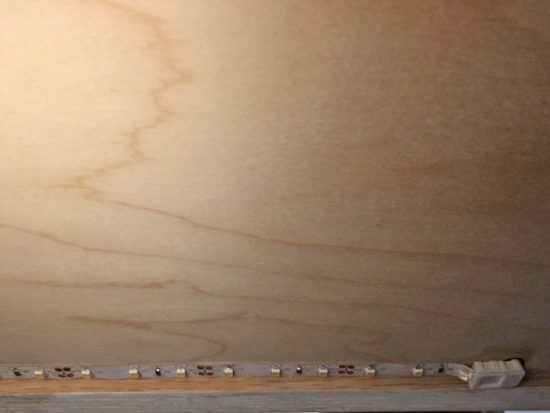
This is how they look under the lower cabinets.
We also picked up a wireless remote to turn our lights on and off, which is really awesome. I would probably never use them if I had to climb up on a step stool to turn them on. The remote, the wire and the connectors were all purchased separately from the lighting kit.
Thanks again to Lamps Plus for sponsoring my kitchen lighting!

This post was sponsored by Lamps Plus and may contain affiliate links, you can read my full disclosure here. Linking up with Between Naps on the Porch.
(adsbygoogle = window.adsbygoogle || []).push({});